Introduction[]
The pros and cons of metal vanes have been discussed here. The process described here is somewhat compilicated, but allows one to create vanes of arbitrary shape.
Making the vanes[]
First create a model vane that has the correct shape. Make sure that the middle part is a little wider than the bolt's shaft or you'll have difficulties bending the vanes to the correct angle. Use the model vane to mark out the subsequent vanes, as in below pictures.
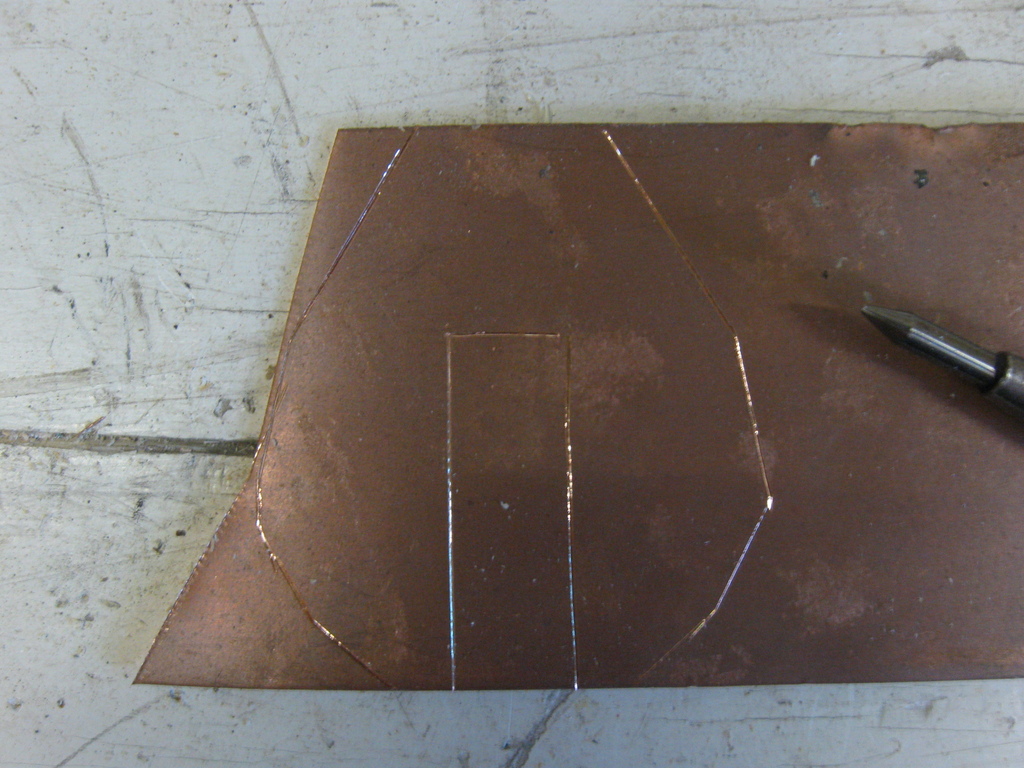
Next cut the vane to shape with shears.

Then flatten the vanes using a hammer and an anvil.

After flattening bend the middle of the vane over itself and flatten it.
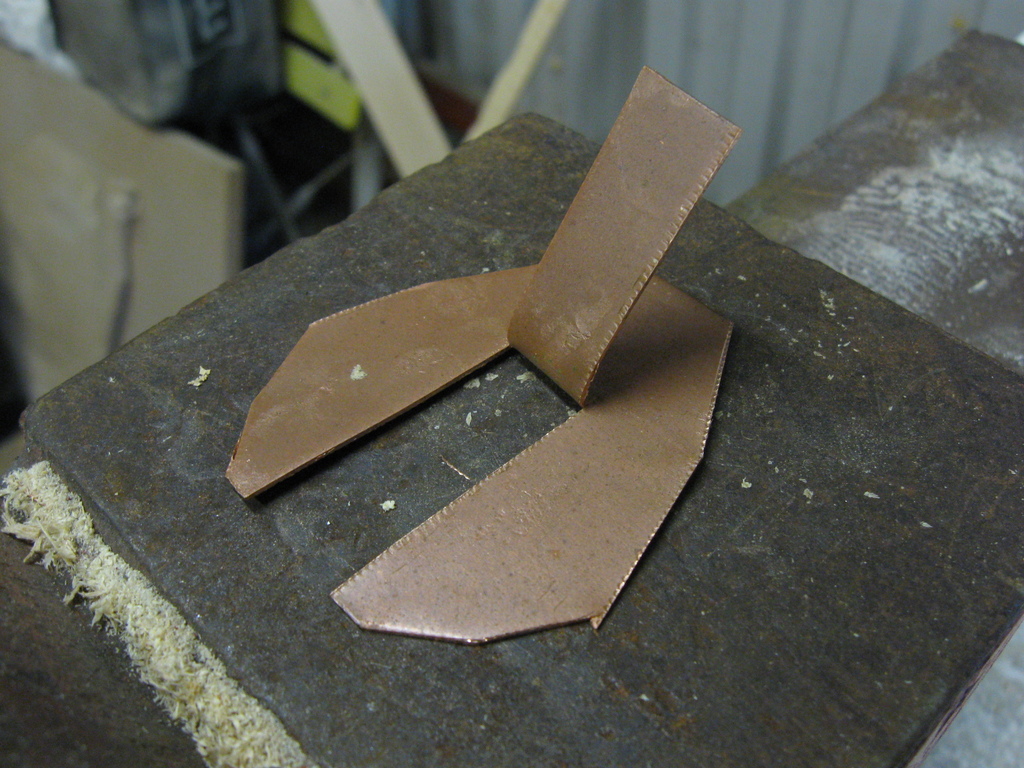
Now cut away the excess metal from the middle part.

Now the vanes are finished.
Cutting the slot to the end of the shaft[]
Next comes the most difficult part - you need to cut a slot to the end of the shaft for the vane. Make sure the slot is deep enough to leave some space behind the vanes. I found no really good method for cutting the slots, but here are some options:
- Cut the slots by hand with a small saw. Cutting by hand is a good option if you have a shortage of good electric tools. You should definitely mark the cuts with a pencil before sawing the slot - otherwise you'll probably start following the grain, which is not usually exactly parallel to the longitudinal axis of the shaft.
- Use a circular saw with really thin blade. A typical circular saw cuts 2-3mm of wood away, which is way too much for our purposes. If a miniature saw and/or a really thin blade were available (do these exist?), this would probably be a very good option. You could try using a standard circular saw and glue three separate wooden strips - two long and one short - to the end of the shaft to fill in the especially wide slot.
- Use a band saw to cut the slots. This is probably the most realistic option for consistent and quick slot cutting. You should definitely use a wooden guide to make sure the cut always starts and ends at the exactly correct place.
Note that it's perfectly ok if the slots are not exactly straight and parallel to the shaft, especially if the middle part of the vane is short. The vanes will be bent to an angle, so the original angle of the vane (when it's flattened) makes little difference.
Making the wooden strips[]
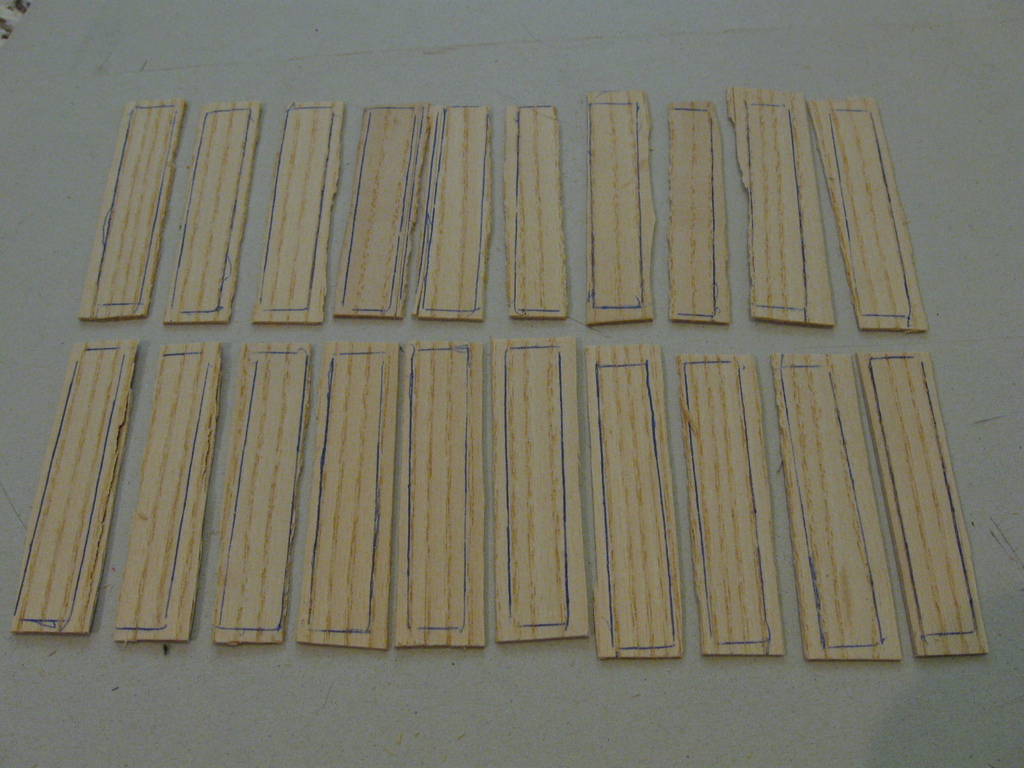
Once you've managed to cut the slots with lots of hardship, it's time to make thin wooden strips to keep the vanes in place. It's by far easiest to buy a piece of relatively thick (~1mm) veneer and cut the strips from it - that's what we do here. You can even use a wood of completely different color for a nice effect. If you're unable to get your hands on veneer, you can of course saw the strips from a plank, but this wastes a lot of wood.
First create a model from cardboard and use it to mark out the individual strips of wood prior to cutting as in below picture:

Next cut the strips - preferably with a Stanley knife - but any relatively sharp knife will do. Cut along the side of a steel ruler to make sure the knife cuts where it's supposed to, even if that means cutting across the grain. Alternatively you can use scissors, if you're not worried about them getting dull.

The strips don't have to be anywhere near their finished shape at this point. In fact, it's better to leave lots of extra wood at their edges.
Assembling the bolt[]
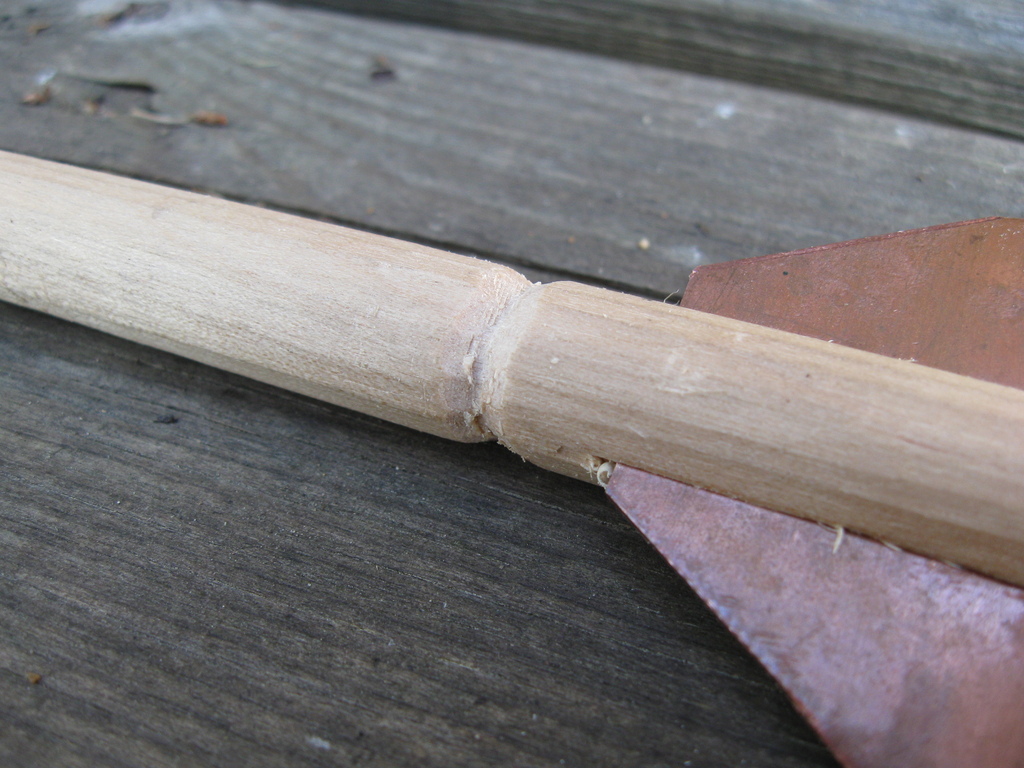
Next take a shaft and wooden strip and shave off the excess from the part that's against the vane.

Now insert the vane into the slot and glue the wooden strip to the end of the shaft - tightly against the middle part of the vanes. Use a bench vice to apply the necessary pressure for gluing - normal clamps won't work without special arrangements. Make sure that the vice presses the two halves of the shaft directly against each other so that the end of the shaft will end up perfectly round.

After gluing the wooden strip, remove the remaining extra wood and form the rear end of the shaft so that it fits between the fingers of the nut (if necessary).

To prevent the vanes from splitting the shaft, make a shallow circular groove around the shaft just in front of the vanes and wrap several rounds of strong string around the shaft along groove.
Finish the job by applying glue to the bound string.

You can grind a similar groove behind the vanes to make the end of the shaft more resistant to splitting when the rest of bolt has penetrated the target but the vanes get stuck.
As a final touch bend the other half of the vane up and the other down so that the bolt starts rotating in flight. If you don't do this, bolt flight will most likely be erratic and unpredictable.