Introduction[]
This article shows how to make crossbow boltheads that are pretty close to some of the types used in the middle ages. The bolthead consists of two parts:
- Conical socket
- Bolt tip (or blade)
The dimensions of these parts vary, depending the size (or rather, caliber) of the bolthead. For a bolthead 12mm in diameter use 12mm round iron rod. If possible, make the tip of steel with enough carbon content so that it can be hardened after forging (or grinding). This is essential if shooting the bolts at hard targets, such as reproduction plate armour.
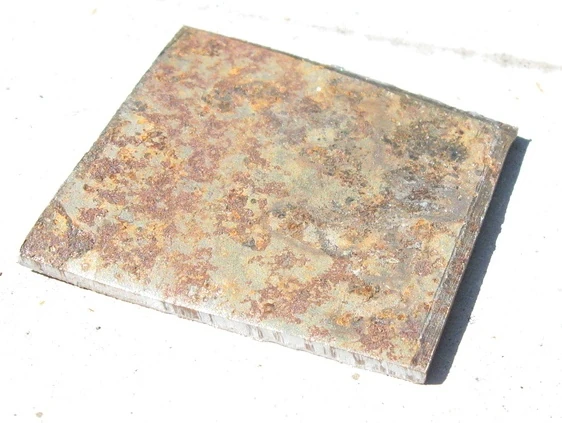
Use relatively thick (e.g. 2mm) plate steel for the socket. If you try to weld a thick iron rod to a socket that's less than 1.5mm thick you'll most likely burn through the socket and ruin it. This is especially true if you want to weld the socket's side seam, too. If you're ok with leaving the socket's side seam open, you can pretty easily form sockets that are thicker at the tip-end and thinner at the base. Just start with roughly rectangular piece of plate steel and hammer it to a conical form using a ball-peen hammer. If possible, heat the socket in a forge afterwards - this get's rid off the internal stress (hardening) of the plate steel caused by the hammering.
To make the boltheads, you should preferably have the following tools:
- A good vise to help with welding.
- A welding machine (MIG, Stick) for welding the socket and the tip together.
- A bench grinder to sharpen the boltheads after forging and to remove the signs of welding.
- Shears or a shear cutter to cut the socket plates.
- An angle grinder to cut the tip from the rod.
- A forge, anvil and a cross-pein hammer with flat, rectangular striking surface. Used in forming the bolt tips.
You can make this type boltheads without a forge - just use the bench (or angle) grinder to form the bolthead. While this type of boltheads work as well as forged ones, they lack some of the medieval character.
The process step-by-step[]
First determine the correct size of the socket plate. This is done by grinding a round steel rod to a correct taper (see below) and making a socket model. Forge the socket to form and adjust it's dimensions if (or rather, when) it's either too big or too small. Adjust the tapered steel rod as necessary. Once you manage to make a socket that's just right, hammer it open and use that as a template for future sockets.
Once you have the template socket ready, mark the outline of the socket plate with it. Then cut the socket from the plate with shear cutters, shears or an angle grinder.

Once the socket plate is cut, round it's wider edge slightly using a bench grinder. This step is not strictly necessary but makes the open end of the finished sockets look more regular. The shorter edge is easier to round after the socket is formed (see below).

Next use a cross-pein hammer to curve the socket slightly. A large block of wood used for wood chopping is probably the best "anvil" for this job.

After initial curving hammer the socket to a much tighter curve. It does not have to look good, but needs to fit pretty closely to the tapered steel rod used in the next step.


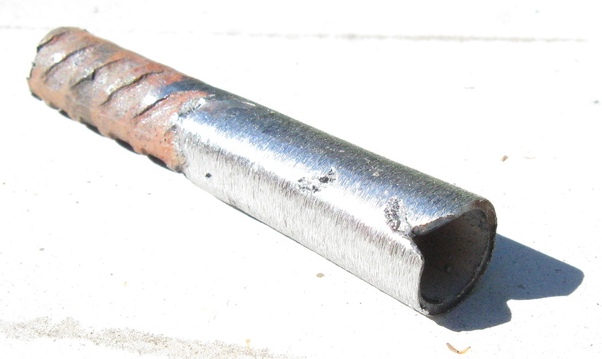
Fit the socket over the tapered end of the round steel rod. Hammer the socket around the taper. This guarantees that each socket is nearly identical to the next one. You'll find the correct technique with a little practise. Next grind the socket's thinner end to a straight angle with a bench grinder. If you don't do this, you can't weld the socket and head together correctly. The finished socket should look similar to the one in above picture.


Once the socket is ready, align it and the steel rod into a vise. Make sure they are tightly against each other and in the correct angle. Then weld the tip and the socket together. If you're using a "stick" welding machine, use small sticks (1,6mm) and very low power. Otherwise you'll burn through the socket. Rotate the rod several times, welding the tip and the socket together from all sides. If you weld the socket's side seam, do a really fast swipe along the seam - otherwise you'll burn a hole in the socket. If you can, use lower power while welding the side seam.
If manage to burn a hole to the socket, you can fill it by welding from the outside towards the inside - weld a little, then wait a few seconds until the metal cools, weld a little more, etc. As always, you'll find the correct technique with practise.
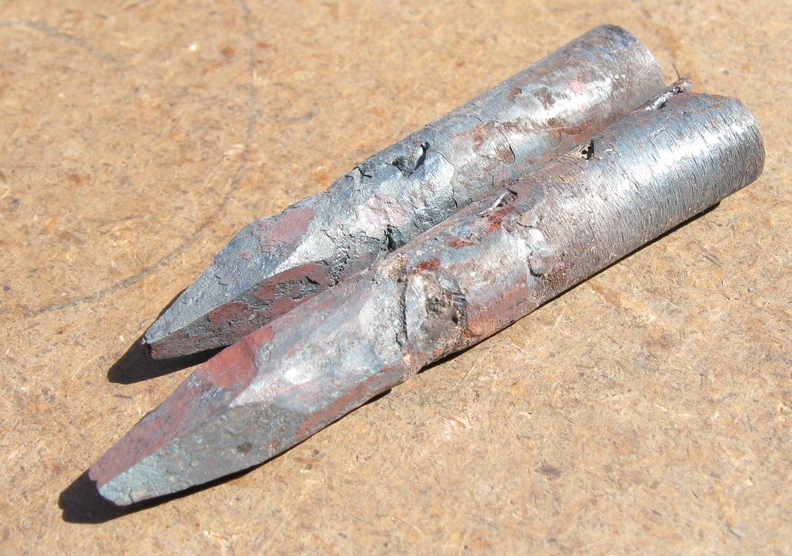
The results of the welding are probably not pretty, as you can see from the above picture. Don't let this discourage you - the bolthead will look much better when finished.

Next grind away the excess welding material with a bench grinder. An angle grinder works, too, but is not nearly as convenient in this task. The result should look similar to the above pictures. Next cut the bolt tip to correct length.

Now it's time to forge the tips. You should prepare several - at least five - tips before proceeding with this step. If you have several boltheads heating up in the forge at the same time, you can hammer the first, put it back in, take the next one, put it back in, etc. Once you've forged the last bolthead, the first one is again hot enough for another round. This will save lots of time and coal. Just make sure you don't have too many boltheads warming up at the same time - otherwise you risk overheating (=melting) some of them. Insert the bolthead to the forge tip down. Otherwise you'll most likely melt the sockets by mistake.
Start forging the heads when they're yellow or yellowish orange in color. If you have difficulty reaching that high temperature, you can forge them at a lower temperature (orange-red). In that case forging just takes more time. Use a pair of pliers to remove the boltheads from the forge and to keep them in place while you hammer them. Continue forging the head until the it is dark red in color. Decrease the force of your blows as the metal cools, rather than vice versa. Once you've formed the head, make sure that the tip and the socket are in line. If not, reheat the entire bolthead and straighten it.

Once forged, the boltheads should look like the ones in above picture. As mentioned above, you don't strictly need a forge, but it gives the boltheads more character - and allows you to harden them.

Next step is to grind the tips to their final form. If forging the head went well, you don't necessarily need a bench grinder - a good metal file and a vise is enough.
If you want, reheat the tips of the boltheads to dark red in the forge and quench them to a pool of cold water, rotating them at the same time. This hardens the tips if the carbon content of the tip steel is high enough.